
CleverControl User Guide
How to create an account
To get started with CleverControl, follow these simple steps:
- Sign up for an account by visiting https://dashboard.clevercontrol.com/register or clicking the "Free Trial" button at the top right corner of the website.
- Provide your name, phone number, company name, and a valid email address.
- Create a password for your account.
- Click the "Sign Up" button to complete the registration process.

How to add computers to the account
To begin monitoring a computer, you need to download and install the CleverControl agent on that computer.
- Sign in to your CleverControl account. After registration, the dashboard will display instructions for adding your first computer.
- Download the installer for the required operating system. You can download it directly on the computer you want to monitor or copy the appropriate Windows or macOS download link and send it to the person responsible for the installation.
- Important: Install CleverControl only on the computers you intend to monitor. You do not need to install the agent on the administrator's computer unless that computer will also be monitored.
- Before installation, temporarily disable any antivirus software on the monitored computer.
Unzip and run the downloaded installer and follow the on-screen instructions. The installation process differs slightly depending on the operating system. For detailed steps, see the appropriate guide:
- Once installation is complete, the program will connect to your CleverControl account automatically. Allow 5-10 minutes for the new computer to appear in the monitoring dashboard.

To add more computers later, use the Computers or +Add New Computer buttons in your CleverControl account, then repeat the process for each computer you want to monitor.
How to view the activity reports
All collected activity data is available in your online account. The data is filtered into several categories such as Screenshots, Visited Websites, etc. for your convenience. You can find most of these categories in the Events Log section.

To view a user's detailed activity chronologically, navigate to the Events Log tab and select All Events within this tab.
For an overview of activity across users, go to the Summary tab. By default, it displays summary information for all connected computers.
To focus on specific employees or computers, use the All Computers filter at the top of the page.
Adjust the summary period as needed with the time filter.

How to export data from the dashboard
Exporting data from the CleverControl dashboard is a straightforward process. Here's how you can do it:
- Navigate to the Reports tab on the dashboard.
- Click the Request New Report button to initiate the export process.
Customize your report. In the options, select:
- The specific period you want the report to cover.
- The user or users whose data you want to include.
- The type of events to be incorporated into the report, such as all events, screenshots, visited web pages, etc.
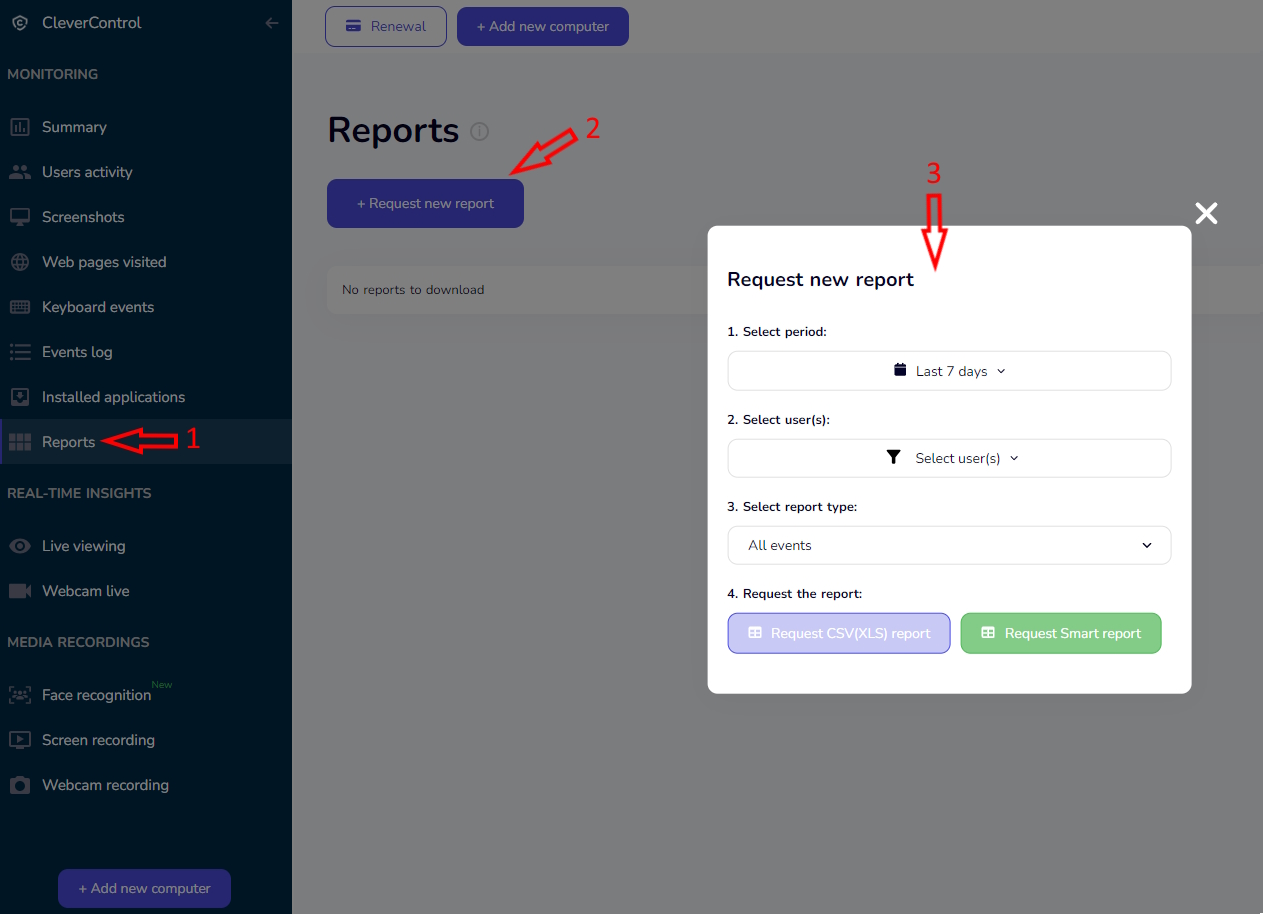
Choose report format. You have two options:
- CSV Report: Contains text-based information like website history and search queries.
- Smart Report: Includes text and media logs, such as screenshots. Note that Smart reports are downloaded in .zip format and require extraction using freely available software like 7-Zip.
Download and review:
- After selecting the desired format, click the button with the chosen type of report.
- The report will be ready in a few minutes. When it is ready, you can download it on the same page.
- Please be aware that neither CSV nor Smart reports contain summary activity or user statistics charts.

How to change the monitoring settings
You can customize CleverControl settings to suit your monitoring needs and control which types of activity the program records.
Access the computer settings
- Click your email address in the upper-right corner of the dashboard.
- Select Computers from the drop-down menu.
Manage connected computers
You will see a list of all computers connected to your account. From this page, you can:
- Edit a computer's or a user's name by clicking the pencil icon next to them.
- Start or stop monitoring for the entire computer or for individual users.
- Enable or disable additional screen monitoring, call recording, and self-monitoring features.
- Delete the computer from the dashboard by clicking the garbage bin icon. Please note that this action doesn't uninstall CleverControl from that computer.

Configure individual computer settings
To access more detailed settings, click Setup Computer below the computer's name.

The settings are divided into two main sections:
Device Info
This section displays information about the computer's operating system and the installed CleverControl agent version.
You can also delete selected types of collected logs or stop the program remotely by clicking Remote Uninstall.
Please note that Remote Uninstall does not remove the CleverControl agent from the monitored computer. It only stops monitoring and blocks the agent from sending data. To remove the program completely, you must uninstall it directly on the monitored computer.
The User Activity setting allows you to specify how long a user must remain inactive before the period is recorded as inactivity in logs and statistics. Shorter periods will not be counted as inactivity.

Monitoring Control
This section contains most of the available monitoring settings.
Here, you can enable or disable features such as clipboard monitoring, screenshots, screen recording, call recording, and other activity tracking options.
If several microphones are connected to the computer, you can also select which microphone CleverControl should use for screen and call recording.
How to arrange computers in groups
Organizing multiple connected computers into groups for ease of management is a practical feature in CleverControl. Here's how you can do it:
Access Group Management:
- Click on your email address located in the top right corner of the screen.
- From the drop-down menu, select Groups.
Create a New Group:
- To create a new group, click the Add new group button.
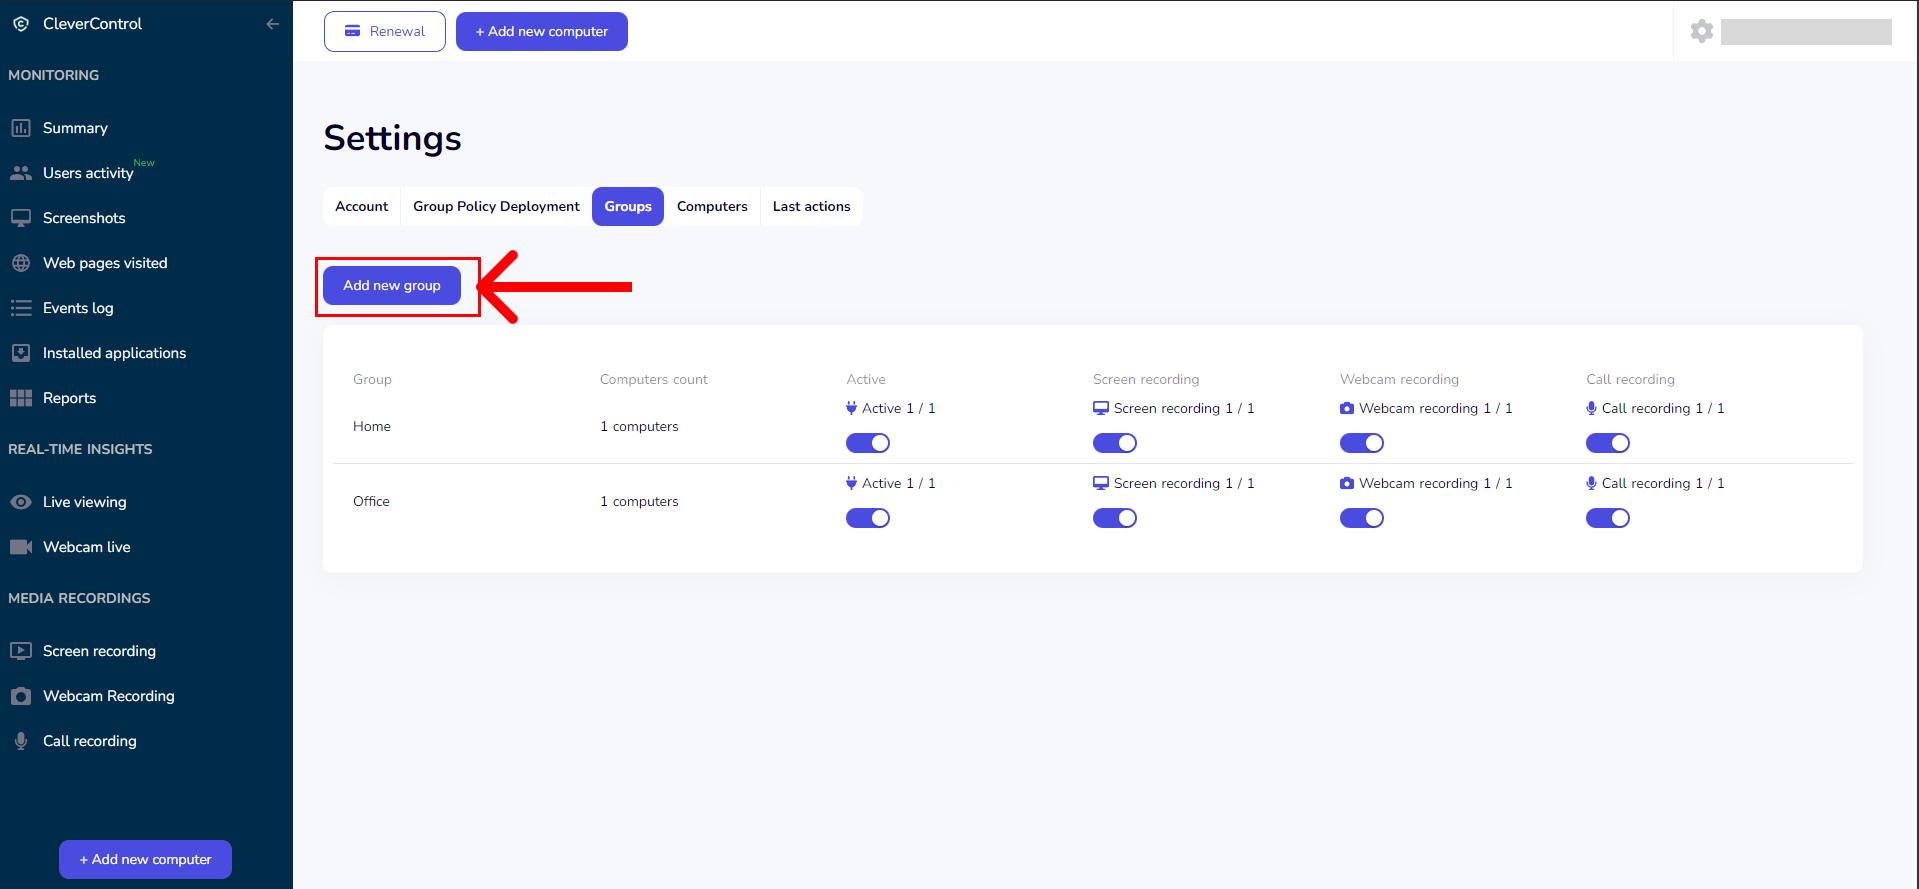
- Enter a name for the group.
- Check the computers you want to include in this group.
- If you have previously created groups, you can use the "Computers without groups" toggle button. It allows you to identify computers that have not yet been assigned to any group.
- To create a new group, click the Add new group button.

How to create subaccounts
If you monitor several departments or teams within one CleverControl account, you can create subaccounts for department heads, team leaders, or other authorized personnel.
Each subaccount can be limited to specific groups of computers. This allows managers to review only the activity of the employees they are responsible for, without accessing data from other departments.
Restricting access in this way can also support privacy and compliance practices by ensuring that employee data is available only to personnel who need it for their work.
Please note that subaccounts have limited permissions. Subaccount users can review monitoring data, but they cannot change the monitoring settings of connected computers.
To create a subaccount:
- First, create a computer group and add the computers that the team or department manager should be able to access.
Open the Access Rights tab at the top of the dashboard and click + Add a subaccount.
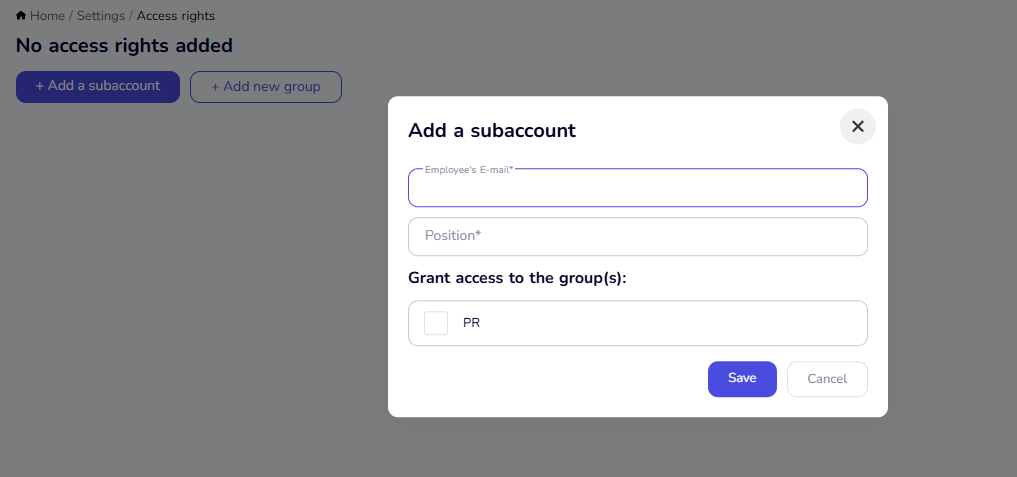
Enter the manager's email address and position. Then select the computer group or groups they should have access to and click Save.
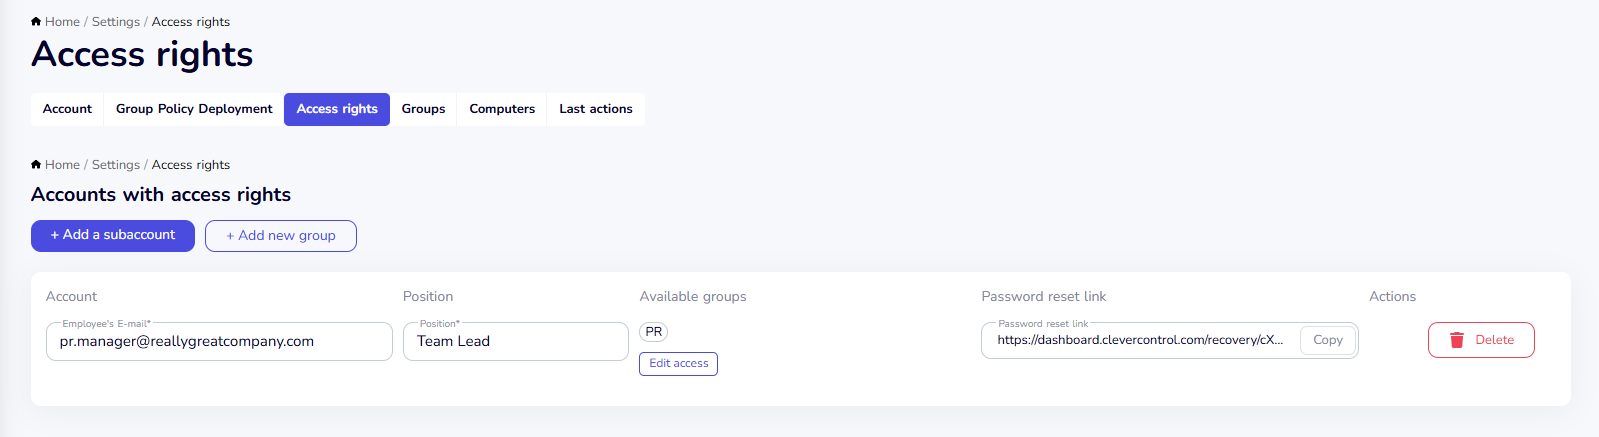
- Once the subaccount is created, copy the password reset link and send it to the manager. They can use this link to create a secure password and sign in to their subaccount.
You can manage existing subaccounts from the Access Rights page. Here, you can:
- Change the subaccount email address or position.
- Add or remove computer groups.
- Delete the subaccount when it is no longer needed.


How to delete the program
To uninstall CleverControl, follow these steps based on the monitored computer's operating system: